Saturday, 29 December 2012

Driveshafts & CV joints

Not much has been done over Xmas,

but one of my drive shafts had a split on the inner CV boot and with the trouble of removing the drive shaft from the hub it literally destroyed it into multiple pieces.

Today I tidied up the drive shaft that was ok and wrapped it up to protect it. One of the things I always do is put a film of oil over parts I don't want to get surface rust, like parts that are going into the gearbox or hubs.


the next job was to clean up the other, its a bigger task then I thought as it is caked in dirt and oil. I have managed to clean up the support bracket on the driveshaft and once cleaned up I was surprised to find no rust and still a lot of protective paint on it. I'm now just trying to work out the best angle to tackle the CV joint.

I did find this youtube video for a nice little tip on how to get it back together....hope it helps me.


The Rear subframe has gone off to be powder coated and the rear hubs as well. I have had the suspension back and started putting in the bushes, ill do another post on that once complete.

Engine should come back next week...hopefully.

Tuesday, 18 December 2012

Coilover,Hub and larger brake mock up

I decided I should do a mock up fit of the corner with the brakes just to make sure everything is sitting how I want. Everything was fitted together finger tight then taken back apart and stored, it fitted together well.

As previously mentioned they are supra discs (uk spec) 324mm and s14 4pot callipers.You can see the custom bracket on the shots below


The engine cover has now been taken off so I will clean that up and spray that red, once the headgasket is completed over Xmas I will clean it up and spray / paint the block black and clean the head so its a natural silver or maybe spray it silver if required.

Monday, 10 December 2012

Another little update

So ive actually ordered the kit now. Now seems the right time with the MR2 stripped and finally having a work space to crack on with bits and bobs.

the space still seems so small


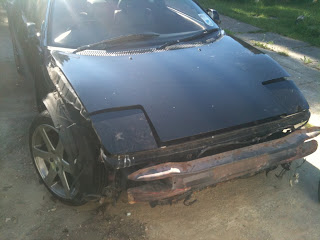
and the mr2 itself outside and undercover until its crushed. The cover is just to remove the eyesore of a ripped apart car!


As well as clearing a space, I finally removed a stuck drive shaft from a hub (that felt like a victory in itself) I also bought myself a cheap equivalent of a Dremel to cut off the brake shields on the rear hubs as the star keys had rusted away. So I cut them off and the disc appears to also be pressed on so cut a little bit of that away.

I wasn't going to do the rear bearings, until I got them off and one barely spins at all when letting go and the other spins but I'm still unsure of. Whilst the hubs are off the car it will only cost me a few ££ to get them done at a garage and of course I can get them powder coated as well.

This will leave me  with fully Refubished corners;
hubs (inc bearings)
calipers (seals, pistons, new pads)
new discs 324mm front and rear
BC Racing coilovers
new braided brake lines
powder coated suspension

my next part is to do the messy job of changing a couple of split CV Gaitors :(

Tuesday, 4 December 2012

Dampers, springs and Coilovers

This area just like the brakes I had been looking a lot in to. After a lot of advice I realised If I could do one thing different I would of when it came to suspension.

NOT sold the shocks on the car, this would allowed me to build the kit car and get the right coilovers as the last piece of the puzzle by looking into corner weight etc... when fully built. Going that route I could of got professional advice on springs, dampers and what might be the best setup and easier to setup.

Unfortunately it was too late for me so I needed to look into coilovers. Most coilovers offer the same benefits, adjustable dampening, height adjustment etc... so reading personal reviews on the suspension almost became a hobby!

I had actually come to the conclusion I would hold off on the suspension but when a set came up 2nd hand of a higher quality then I was looking at but for a cheaper price and barely used ... I couldn't resist!

The main features I wanted, dampening adjustment, ability to swap springs if needed and finally an ability to adjust ride height without effecting the damper travel.

The set I've managed to get are BC racing RM series coilovers. They have some additional features on top which can be read in the below link.


The one feature I'm happy for is camber adjustment via the coilovers, it may make life a little easier.

They also have pillow ball top mounts so will have less flex. The coilovers and setup of this suspension is going to be critical to produce any form of comfortable ride as polybushes will also take away some flex as well. Obviously not being a daily runner the car can be of a stiffer setup but some comfort for UK roads will be needed.

Setup will be the key! Photo below as you can see like new and ill just give them a slight clean to get rid of the dust and apply any further grease needed on the pillowball joints;


Tuesday, 27 November 2012

Little update

The Engine was picked up at the weekend and taken away to be worked on. As well as having the head gasket done, I've decided to get the valves lapped as the head is off.

Lapping the valves is where the valves have a paste put on them that has fine grain in it, the valves are then spun in their seats and the valve is cut finely as well as the head giving a better contact area and seal (there are various ways to lap valves). So when the fuel is ignited there is less leakage around the valves, this should mean it runs cleaner and in theory produce slightly more power. however my personal reasons is to have a smoother running engine, so the valve seals will also be changed at the same time.

This week ill be dragging the MR2 shell out of the garage to be picked up and taken away and then cleaning the garage a bit for my work area.

Sunday, 18 November 2012

MR2 fully Stripped

Managed to complete the goals for this weekend with mild weather to help me along.

* Remove the accelerator cable - that was a nice easy job with it just unclipping all the way under the car.

* Remove last loom - this caused me some issues, I had one loom from the front boot which included the lights - down the passanger side - into the engine compartment. For the life of me couldnt work out how to get it out the car so I posted on a UK MR2 forum...and bingo the one trim plastic I left on, I popped open and two 10mmm nuts holding the 2 seperate looms together was revealed! Thats all looms out the car now as well.

* Fuel Pump - dropped the fuel tank without jacking up the car at the front or anymore at the rear so was over the moon with that. Some quick tips on this. the coolant and aircon pipes are attached at 3 places along the car, the rer bracket, front bracket on fuel tank and finally at the front just as the pipes start heading upwards. Once all of them are undone just lever the pipes out the way and the tank will come free. another tip, pull the front end down to the floor first... then you can just go in the engine compartment and push / pull the back down without being crushed!


I'll now check with Diego at DDR about what little bits I have left on the car to confirm I dont need them! then the shell will be moved to outside and picked up and removed.

In the meantime the bracket adapters for the 4 pot calipers and to move the mr2 rear calipers further outwards arrived. Ive ordered the UK spec supra discs for the front and the rx8 front discs for the rear. so 323mm on both ends. I'll do a seperate blog post on how it all looks once I get the front hubs back and can do a mock up of the look.

Some pictures of how the MR2 now looks from front to back;


Sunday, 11 November 2012

And the Engine is out

I managed to get the engine out. With the MR2 it is easier to drop the engine out rather than lift it out.

Preferred tools are a jack, pair of axle stands and engine crane. I didn't have an engine crane and do plan on buying one but the issue I currently still have is space, where would I put the engine crane with the engine on it? I had to come up with a solution where I could remove the engine but put it back for storage in the space it came from.

My solution was 4 axle stands, a car dolly and a jack! So I followed the guide I posted previously and got to the stage of undoing the last two axle mounts, before doing this I lowered the rear of the car to the ground with a car dolly underneath the engine and gearbox. the car now sat like the below yesterday evening. I now hoped to raise the car and leave the engine where it is.


so to do with out an engine crane was a case of raising each side slowly and putting an axle stand under each side as I went. The reason for 4 is for safety because it of course could slip going this high. To help the tilt at the back the front was rested on the ground and the hubs put in the front to weigh it down. the photo below is before the final little push up.


Now I can easily just role the engine in and out to work on the engine and the car. For everyone's knowledge by following the previous guide I posted the engine came out with no effort at all, a small wiggle was all that was required.


I've decide rather then keep the shell outside for any parts I may need I will literally strip as much as I can and confirm with Diego (DDR Motorsport) I don't need anything else. I know I need to remove;

* Accelerator Cable
* Fuel tank (for pump)
* last of the wiring harness's

Then I can look into getting rid of the shell!! Which will give me a nice warm garage to work in and more importantly the space I need to work easily.

Wednesday, 7 November 2012

Engine Parts arrived

The engine parts have arrived. As you'll see every box gets labelled when I'm doing this (even if obvious);

* Water pump
* New belts
*  Thermostat
* Headgasket Set
* Head bolts (stretch type)


Also have brake pads come for the s14 4 pot front caliper upgrade. Just sourcing some discs now for the upgrade to the front and back!

The weather is looking good for this weekend, so will attempt to drop the engine this weekend...wish me luck, I don't have the best tools for this part of the job!

Tuesday, 30 October 2012

Photoshop

Well I've been playing round with photoshop whilst waiting to drop the engine and got to say the carbon look with matt headlights does look good to me!


Sunday, 28 October 2012

Ordering parts...

With the engine getting close to being dropped I needed to order parts for it. So I've spent this weekend researching and ordering

* Timing Belt
* drive belt
* Headgasket set
* Head bolts (the mr2 have stretch type)
* Water pump

The engine i currently have suffered from a radiator failure before i bought it but compression had been checked etc... but I wanted to replace it to be 100% sure.

As well as this the rev 1 and rev 2 versions used a paper gasket and the rev 3 onwards used a metal gasket. The metal gasket is stronger and is compatible with the rev2 head. This should make it stronger.

The engine is also covered in oil and this looks to be coming from the rocker cover gasket so a headgasket set kills all the birds in one go! Obviously at the same time ill be cleaning up the engine as much as I can!

I don't plan on upgrading this engine to high power 260 / 70bhp in such a light car for road use willl be fine! the money is going in the build not the engine for a change! So have gone OEM or equivalent for parts.

For the UK people I used a forum and eurocarparts.com to source parts feel free to use code 30now for 30% off at eurocarparts!!! how long it will last I don't know, but 30% is a good saving and they do free delivery as well.


Wednesday, 24 October 2012

Little update

The only parts I have left to take off the car are;

* wiring loom from engine bay through cabin (awaiting engine drop)
* accelerator Cable
* fuel tank drop (need fuel pump)

then the engine drop, I have dropped the subframe now so the engine is held on by just the left and right mounts. these are the two that take the weight anyway, the front and back are to stop twist.

I'm hoping to drop the engine mid november.

The IVA is no doubt a tricky test to the point of even the bolts. they ask that the bolts show the gradings and being the UK this is metric based. So 8.8 would be required for suspension pieces  However the mr2 (being an import) has the imperial markings for strength on them. So I have sourced online the SW20 service book and it has a guide in there to bolt markings and the strength that this means. Ill be printing this off to keep with all my other paper work which I will need at the IVA to prove to the inspector the car is safe.


Wednesday, 10 October 2012

The IVA test...

when building a kitcar in the UK we have a test to meet the requirements of for the car to go on the road. If I was using a chassis from an already registered car and the engine then an IVA (individual Vehicle Assesment) wouldn't be required.

So the test / manual. Its 200 odd pages of criteria to meet, from lights (angles, postions, markings), fuel tank, wiring, fixings,. To the radius of edges within the cockpit area.

I've been reading the manual over and over for the last month or two, its key to know as much as possible because you will need to build the car too meet the requirements. One for gullwing doors for instance is that the car must have a bolt with audioable warning if the car is moving and door open or an automatic way to close the door if the car starts moving.

Below is the link to the site that hosts the manual..

http://www.businesslink.gov.uk/bdotg/action/detail?itemId=1081997083&type=RESOURCES

Wednesday, 3 October 2012

Front hubs powder coated

I got the front hubs back off a friend who is powder coating all my parts for me, He has all the suspension now. So when they come back I can fit the bushes. Once that's done I will make up each corner so relevant bolts are kept with where they came from... Stops bits getting lost!!

these hubs are now off to have the bearings fitted!

Saturday, 29 September 2012

Prepping for the Engine Drop

Today I started prepping for the engine drop.

This involved sorting out electrical connectors on the loom and ECU and also removing coolant pipes, fuel pipes, vacuums etc... and making sure the engine is free to drop.

As I have started this you find individual things with your car, be them 'bodges' or bonus's.

* Bodge.... the bracket holding the air intake had broken, so there was a bad weld on it to repair it.
* Bonus... found an aftermarket intercooler on the car. Cant tell what it is until I get it off though.

I've been using the below as a guide so far to dropping the engine.

http://turbomr2.com/MR2/HowTo/Engine_Upgrade/Removal/Removing_the_3SGTE-01.htm

I now need to clean the garage a fair bit, I'm working in a small space and want to move the car forward and have a clean area to work dropping the engine, so once its dropped I can keep it behind the car.

Friday, 28 September 2012

Recent work...

Not much to report on with pictures.

I've stripped out the hand brake cables now and also the gear cables. I've got replacement bushes as well which will make gear changes feel smoother.

In taking off the rear suspension I found one piece was bent properly from the initial crash a long time ago.

I've sourced a replacement but can't check to see if there is any damage on the sub frame until I get it off.

Tuesday, 11 September 2012

First Wiring Loom tidy up

So yesterday and today I stripped out the loom, the one I removed was in the cabin. Now I won't wire in a sound system till after the IVA and also not with stock wiring. So I wanted to remove the wiring, all the wires in the below pic behind the seats were for audio or door shut sensors, other than 1.


2 hours later and alot of patience...


I was going to remove all the aircon wiring as well, but decided against it. Wiring isn't my area and I don't want to fiddle too much, all I've removed so far I know can't cause an issue in the running of the car. You can see how all the rear wiring has been removed, but also how the centre part at the front has become less cluttered due to the removal of the headunit plugs.

Reason for removal... Weight, it's the cheapest way to increase acceleration and also keep reliability.

Sunday, 9 September 2012

First loom out

The electronics were the next bit to be removed whilst I wait for my car dollies to arrive. So I started work on the interior

Labelling, I cant stress how important, just number either the connector and device or both connectors so your sure where they go.

When I knew I wouldn't be putting that electronic bit back in i noted what it was, for instance door Control system, Audio cables etc... The reason i did this is, is because i need to make a decision will I open the cables to strip out unwanted cables to reduce weight. I will do another post soon on why this is so critical and an important decision.

So as I started to strip and label this is what faced me after a bit of time;


bit daunting to say the least but the labelling may well be my saving grace. The biggest thing I've learnt is its annoying how they bundle looms together whether that be taped, tied or in plastic. It makes it very hard to remove...but I guess it was not designed to be removed.

Below is the loom laid out, how it came out of the car, I got a lot of the relays in the cabin still attached and as well that it all labelled up well, the wires to behind the seats seems to just be for audio, so i may break apart this loom and strip it out, it will be a good weight save and make fitting easier otherwise i will have to feed the back part of the loom in as well and secure it of course.


Once it was out the inside is nice and neat and has some space. I have not bothered packaging up the nuts and bolts from inside the car, there is no point as they are not torqued high and all have the same purpose I will just collect them from inside the cabin at the end of the stripping process.


Friday, 7 September 2012

New Bushes

The bushes I ordered have arrived. 1 front and 1 rear kit.

Remember a rev1 mr2 has different front suspension to later rev's so the right kit is needed. This was another bargain off eBay for £60... It's easier to get the bargains when your not rushing!

As well as that the new lower ball joints arrived, front and rear.

Electrical wiring...AAHH!!

I had to start the work on an area I wanted to wait to do...wiring, but it seemed appropriate to finish the front end area. So I have been pulling the front loom through it includes;

lights, ABS, Aircon, wiper jet pump, power steering and a couple other areas of wiring.

the dash has now been removed as well as the heater unit and the labelling of all the connectors has started. I will take a picture as it looks a mess!

I do have to tidy the loom up a bit, wiring has been stripped or poorly repaired in places. I also want to strip out unwanted weight, the radio / speaker wire loom ive already pulled out, i'll wire my own high quality wires later. I will probably remove all the aircon wires as they are not needed (complete afterarket system will be purchased which is smaller and lighter), all wiring to the doors is not needed any more either, its going to be a big task!

But I will just label and remove for now and save that till the winter when its raining and I can then do that inside in the dry.

Friday, 31 August 2012

Refurbished Calipers

So I got the brake Callipers back today, they look amazing! (big thanks to company called Big Redd) So I have had them fully refurbished, all cleaned up, all new pistons, seals etc...

I'll let the pictures do the talking. So now I'm waiting on the adapter plates for the front calipers and also the rear calipers (to push the Calipers out further for bigger discs).

the hubs went off today to be shot blasted and powder coated as well as some suspension parts. I need to consider do I go for colours, Like orange suspension arms to give it that extra look. I'll be doing some research into what it may look like.


Tuesday, 28 August 2012

Fan restore


Next the fan shrouds were in Poor condition with surface rust, so required wire brushes, wire wool scrubbing and then finally painting with rust convertor.


This then restored the look further, I still may long term replace the fan with some similar after market jobbies as this makes the radiator assembly quite bulky!


Sunday, 26 August 2012

Cooling System

The DDR kit comes with the majority of the cooling pipework. What is required from the mr2 is the radiator and fans. Luckily my radiator was in great condition with very low amount of rust and also very few broken coooling fins.

I then decided to paint it black and apply an emblem stencilled on (it is in the middle the photo angle makes it look like it is not). I will now work on refurbishing the fans or may move to buy some new ones.


Sunday, 19 August 2012

Steering Rack refurbishment

Completed the Steering Rack refurb today and also removed the handbrake cables from the underneath of the car. On the mr2 the handbrake does not have its own drum or separate shoes, It uses a cable to apply pressure into the calliper and effectively apply the brakes.

When the brakes are back from being refurbished I will be able to show the mechanism. In the meantime this is the refurbished steering rack, when i refurbish the item i make sure the whole thread can be used as I dont know how much adjustment will be required when refitted.

Often there is a high level of rust, so the best way to remove this and set the thread back is using the nut itself simply twist it back and forth, going a little further each time and it effectively re-cuts the track and removes the loose rust.


Friday, 17 August 2012

Steering Rack and Column

So following the front suspension being off I wanted to get out the steering rack, steering column and finally the PAS system. I will be leaving the electronics till last to do it all together (my weakest point).

So first I dropped the rack out, very simple, held in via 4 bolts on brackets and two pipes leading to the rack and a small bolt inside the front boot where it joins the column.

TIP: undo the large bolt on the rack before fully dropping it, it can be quite tight and the PAS fluid will need to drain out, to help it drain keeping turning from lock to lock to get it all out. Once out it will be like the below;


Next I moved on to the column itself, again another small bolt will need to be undone on the column so the swivel joint can come off. when you pull the column through to the cabin area.

Next you will need to remove the lower half of the dash around the wheel which will be held in with a few screws. Once off remove the plastic around the column as well. The first step is to disconnect the electrics, what you do now may save hours later...so get into the habit. I simply wrap masking tape around the wires and on the loom end put a description and number 'Ignition 1' and on the ignition end just put a 1...I know its the ignition....its attached to it!

The column is held in with 4x 14mm nuts on studs, when you undo them the column will fall to the floor, so be ready! this is what it looked like when removed.


Not exactly clean looking for your new kitcar is it. Rust gets everywhere even if light surface rust so first i used a paint brush to remove fluff etc... and then a cloth for excess grease, don't remove all grease it is needed on the parts. Following that I wanted to paint it to give it a better look, so I used rust inhibitor / converter  Basically you paint it on and it stops it rusting and gives it a nice finish, you can paint over the top again if you wish, I don't need to on these parts.

I then decided on areas I wanted to paint, I didn't paint the main area in the middle due to its use and grease around there, but I may change my mind and do it later, below is how the piece came out, as you can see, much better. I will be using the rust converter paint a lot and then spraying silver in some cases as we go along....

TIP: You will see I redid the masking tape and numbers before I went and stored this piece away with the nuts for this piece in a bag tidied round the column.


next...
remove the PAS motor and piping.

Learn something new everyday - Suspension

As I previously mentioned I was removing the parts of the suspension required and it into a knowledge session rather than manual labour.

The Mr2's suspension changed between Revision1 and the Revision2 of the Mk2 model. My donor car had previous crash damage so I had a Rev1 front tension bar (threaded rod and bolt) one side and a rev2 the other side (standard bush style arm). It took a lot of investigating to get to the bottom of the issue.

I was in touch with Diego from DDR Motorsports and we discussed the suspension and that i'd be needing the Rev1 suspension. So I will just source a passenger side lower arm and go from there. I must say Diego has been excellent, im not officially a customer yet as I just don't have the space to order the kit whilst I have the donor car but as I say he has been helpful through out.

Once the arm was off I needed to remove the bush as I will be replacing all of mine for new (like anyone should in my eyes) so out came the blow torch to burn it out, after 5 - 10mins I was far enough through that a mallet and screwdriver pushed the rest out. Next...shot blasting and powder coating and then fitting the new bushes.

I would have a picture but my camera died at this moment....typical!

Monday, 13 August 2012

As you strip you learn..

So Ive got the car into my small garage now and off of the driveway ready for the weather change in the UK. not that we've had a summer.

So I got the car on to axle stands and started to strip the front suspension. I was once told you'll learn things you know and things you dont want to know about your car when taking it apart.

this statement is true, rust, seized bolts are just too of my problems as well as the requirement for a 22mm deep socket. Something I didnt have. I also broke my breaker bar on one of the last nuts so ordered a new one as well.

The hubs are now off and have gone to have the bearings pressed out, I will then have them shot blasted and powder coated, the nback to have the bearings replaced.

The 200SX upgrade calipers and mr2 rear brakes are currently being refurbished and  will have them back in just over a week.

Next is to finish the removal of the front suspension and then the steering rack.

Sunday, 29 July 2012

Progress update

Over the weekend Ive continued to strip the car for bits to sell and to make it easier for me to work on the car, all of the interior panels other than the dash are now out. Bumper, wings and exhaust are off as well as the spoiler. I paid only £1000 for the car, so with parts sold so far ive got initial outlay down to £650.

Over next couple of weeks ill be stripping it a bit more (not much) i will take the doors off so its easier to work on once in the garage. Ive also won a pair of S14 calipers on ebay for £50 which seems a good price so I will need to now work re-conditioning them.

Wednesday, 25 July 2012

Brake Options

Although this stage is a long way away from being on the car, I like to plan in advance and have the brakes ready. When the shell and chassis arrive, I want to be ready to get on with it. I dont feel the MR2 brakes currently work amazingly or look good. You'll notice most sports cars have brakes that fill the wheel, often for cosmetic reasons as well as functional.... This includes the back wheels.

So ive reviewed various options, I started before posting this blog so it has taken some time and even now still weighing them up. I dont need a fancy big brake kit costing me £1000 - £1500 (and thats if im lucky).

So the option that seems best is to use a 200SX s14 caliper with a Supra TT (uk spec) 323mm disc at the front. The calipers are fitted via an adapter, which some MR2 forum members make in the UK. And at the rear use the standard caliper with RX8 323mm rear discs. The reason for using RX8 discs at the back is they are thinner then supra's front discs. This is a common mod on MR2's

Each s14 caliper weighs 5kg compared to the standard 5.9Kg so are lighter as well. I am now on the look out for S14 calipers and will then get them shot blasted and powder coated as well as reseal them. Ill then post the process on here with pics so you can see the transformation.

The stripping begins

Ive started stripping the Mr2. Im stripping for two reasons;

1. to sell bits on. If i sell enough, Ill effectively get the car (so engine gearbox, electrics and some suspension) free. I cant moan at that. I managed to get the car for £1000 because of issues / niggles that didnt bother me, rust on sills etc...

2. I need to make the car smaller to give me more space in the garage to work.

So I'removed the front bumper, front wings and all interior other then the dash and the rear spoiler (for selling purposes). I will continue on over next few weeks. I will get some black electrical tape to cover over the holes left from the Spoiler. Heres some current pics.


Tuesday, 24 July 2012

Donor Car Purchased

So I've picked up a Donor Car. Its a 1992 JDM import with 67k miles on clock. You have to take mileage with a pinch of salt on an import to be honest.

Just before I bought it the owner had the radiator go on him, so had had a compression test done and was showing 13 / 14 bar across all cylinders. He had fixed the issue...So why go for this car if its just had such an issue.  Simply put the engine has been compression tested so I know its ok and better then potentially other engines. I will also be changing water pump, cam belt and will now probably do head gasket whilst the engine is out of the car. All quick jobs when you dont have to dig your hands in small gaps!

Other then that it has leather interior and a few minor mods (wheels, exhaust, Field ECU). Its time to get stripping the shell panels off now so I can work on the car easier then get the interior off. I will sell all the bits to get rid of them. Ill then move on to stripping the suspension off and start the prep of the parts. If your after MR2 bits I'm based in Dorset, UK. so feel free to ask about some parts or most will end up on ebay!

Ohh did I mention its a turbo ;-)


Thursday, 19 July 2012

....Preparation is the key

Before I could even think about starting on the car I have had to spend the last few months preparing the Garage, which then turned into the Garden as well.

The garage was full of rubbish which needed to be cleared, some bits of equipment would need to be kept. The garden was overgrown from when we bought the house 2 years ago. So I decided to do both at the same time. It took a total of 3 months to complete, but Ive managed to make the garage empty as well as a garden for my Girlfriend and I to enjoy. If the british weather ever decides summer is here, it would be nice to have one BBQ!

I also put down anti-fatigue matting in the garage so in the winter its that bit warmer and also so I dont have to lie on a concrete floor when working as it does help not have ache's and pains.

The garden went from this;


to this;


The Garage with the matting added;