Sunday, 30 June 2013

Engine Almost Complete

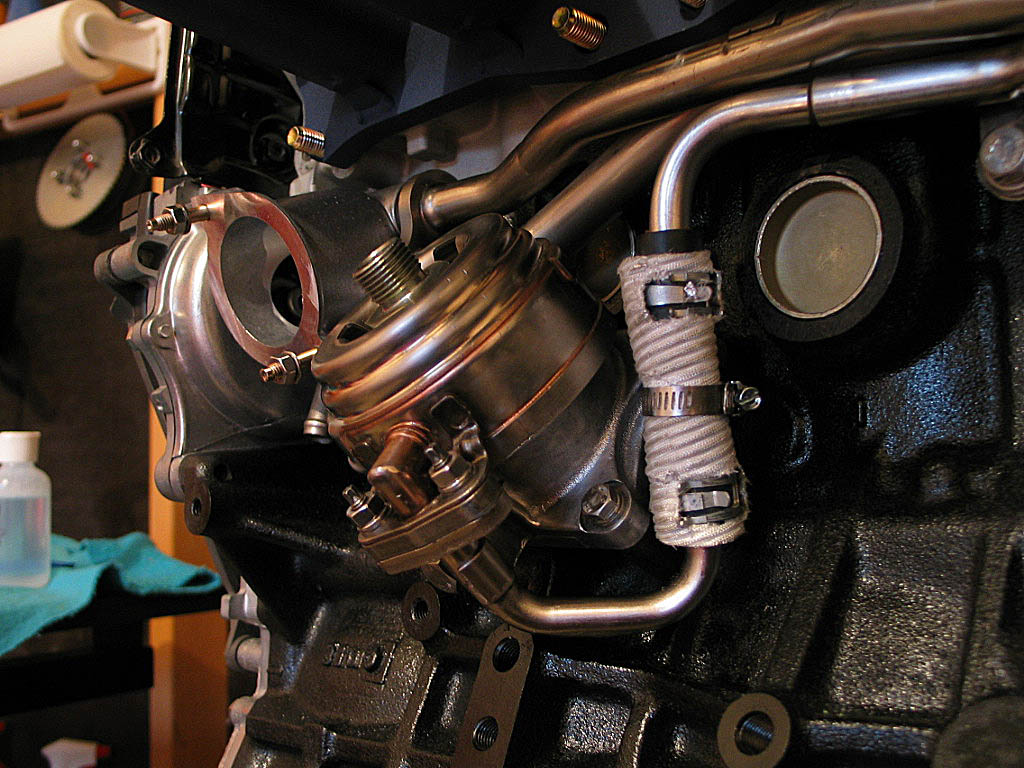
So I've been plowing on this weekend with getting the engine back together. Firstly I'm reconnecting it back up using the old pipes before replacing them....why...

The memory of the rubber makes it very easy to work out what pipe goes where as they bend naturally to the position they were in before making the task much easier, ill then once complete replace each hose one at a time. How the engine currently looks;


I've also got the loom on there as well and everything just gets messy again on the other side but it will look tidy enough once done.


I should have the engine completed by Wednesday in preparation for my visit to DDR, the reason having everything ready is key to me is space this end when the kit arrives. Really looking forward to getting down there and saying Hi! Been talking for so long and I never actually thought I'd get to go there in person and meet the guys.

Friday, 28 June 2013

Engine work continues...

So After my fight with the catalytic convertor, I ended up drilling out the left over studs. I'll now use nuts and bolts when it comes to replacing them, mainly because its simplier and in the future if it becomes a problem I can but them off.

I noticed the gasket between the turbo and manifold had blown so that was replaced... the blow torch has been getting some good use recently to say the least!

Once that was completed the painted manifold was replaced and the turbo unit put back on lining up the oil feed / return pipe.

I chose not to paint the turbo, Ill be getting a turbo blanket to keep the heat in on the exhaust side, hotter air flows faster so it should leave through the exhaust quicker and help spool times, this will also stop heat soak into the engine bay and keep everything running a little cooler, not much but every bit helps!

As well as this the water housing was connected and its already beginning to look a mess again. I will be replacing most of the pipes with new, but ill replace the pipes one by one once its rebuilt and that should clean it up further and also at that point do away with pipes I dont need like the relevant vacuum ones.


Sunday, 16 June 2013

Catalytic Converter troubles and Answers to questions

I noticed when the turbo / exhaust was removed the cat looked in bad shape...Well that was an understatement. I took a look at it and the cat had actually completely come apart and was resting on the temperature probe that went into the cat and the inner core was no longer attached to the tub.

The inner part to the cat had broken away in one piece and one end rounded off where it had been bouncing and jumping around in the pipe, I'm sure it would of been causing some exhaust gas flow problems.

As well as this when trying to remove the cat... 1 snapped stud and 3 snapped bolts. So I started to drill them...queue snapped drill bit on the last one. At least this headache is offer the car and now. What I plan on doing is drilling them out and rather then rethreading Ill just use a bolt and nut to attach the next Cat on to it as it will be a simpler process.

...the fight continues!

I've had quite a few messages about when I will be actually be doing the kit / build stafe and when I will have posts on that.

From speaking to DDR my kit will be ready soon. I'm also going over to Florida, USA in July so will pop in and see the guys whilst I'm over, always nice to put faces to the names and we've talked a lot regarding the work so far. I hope my order will be ready by then...as I fly in its sailing out and then on my return I can crack on.

I am concentrating on the engine at the moment, as soon as that's complete which will be soon they'll be no more work for me to do till I get the kit so Ill be in a good prep'd position.

Thursday, 13 June 2013

Cam belt and tensioners

So as the engine was put back together I had bought a full gasket set and also both idle pulleys. I had decided I was going to replace them anyway whilst I had the engine apart.

Im glad I decided this as one of the pulleys was dry when spinning and quite loud for a pulley, it also did not free spin. New one on free spinning and quiet.

Using the toyota MR2 manual the cam belt was easy enough to do and went straight on.

The first is a very short video to show you how an idler bearings shouldnt sound! You can hear how long it doesnt free spin for.


and a picture of the cam belt and lower cover on, I will clean up the pulleys and make them look nicer once complete. You can see one of the new idlers.

Sunday, 26 May 2013

Update and Engine Progress

There had been a delay in the delivery of the kit, so I took the time to do some other tasks I needed to get done not car related, well I completed them so back on to the engine...

Yesterday the head was refitted and then the rocker cover.

 ** head bolts are stretch type so should be replaced. I also upgraded to a rev3 metal head gasket, there are some hole size differences and placements of the holes regarding the water channels. Biggest change I noticed was larger and additional hole on cylinder 4 which would tie in on what I've read regarding heat temps and cylinder 4 being the hottest. **

Head bolts should be tightened in the correct order at 500kg /cm and then an additional 90 degree turn. Only 2 steps on these bolts.

So here it is;


...On to turbo and exhaust manifold!

Tuesday, 23 April 2013

IVA compliance.. slight redesign of the backend

The kit itself (exterior wise) although appears to meet a lot of the requirements that I can check at the moment without having it infront of me but does have a few areas which do not meet them. Areas I can tell without the kit in front of me are;

* Reversing lights to close to brake lights
* Exhaust edges too sharp
* No Fog light

So I have been messing around in photoshop in a very basic fashion to re-design the rear very slightly to make sure I can do what I need to. I can only estimate measurements of where lights are but everything looks fine on that front.

Firstly its now a pair of rear / stopping lights, This kept the backend looking very similar as I liked the look before. For the IVA it states fog and reversing lights cant be within a 100mm of a stopping light...hence goodbye reversing lights.

I think the solution below of having two lights of a smaller size within the centre area looks quite good. One fog / one reversing light.

The exhaust I've just opened up in to a single exit either side which will be turned back on itself so no sharp edges are on show. I haven't played too much with the photoshop of the image as other changes are down to my preference than meeting requirements.


Engine wise its still being rebuilt at the moment and ill put a post up as things progress and is worth posting.

On the down side I did find the cat after the turbo had destroyed itself and was being held up by the lamba sensor...I'm sure that would of been hampering performance before!

Wednesday, 17 April 2013

Update on Current Work

Well I decided to go a bit further on the engine cleaning then had planned and the block in the end was basically cleared of brackets etc... and painted.


At least it should be very clean when being put in the car!


** TIP **
On the other side of this block are two hoses that are nicknamed say hello to

The Hose from hell


The Hose from hell On Earth


I strongly suggest whilst the engine is apart you change them so you never have to once everything is back together. These hose's make MR2 owners cry when they leak, I'm sure its not as bad on a kitcar..but why take the risk of having the hassle.

The smaller one comes with clips and is about £15 the other about £30....money well spent!